Send SMS from Google Spreadsheet
Send Single/Bulk Personalised SMS from Google Spreadsheet
In this tutorial, we'll demonstrate how to send SMS messages to numbers listed in a Google Spreadsheet using Apps Script. Apps Script is a cloud-based JavaScript platform that lets you integrate with and automate tasks across Google products. Even if you’ve never written a line of code before, the process takes less than ten minutes to finish.
Using our code, you can send single/bulk personalised SMS. After once, you run your campaign, an Email will be sent to your logged-in Email about success/failed messages summary.
What does this App do?
This app helps you to send personalised SMS messages to your contacts from Google Sheets.
- Send Bulk SMS from Google Sheets.
- Send Single SMS from Google Sheets.
- Send Selected Rows SMS from Google Sheets.
Before you Begin
- An SMS Gateway Center’s SMS account with credits in your account balance with a paid subscription.
- A completely functional Google account having access with Google Spreadsheets.
- As per the DLT mandate, the following account details will be required to send an SMS. Kindly configure these under Settings on your SMS Gateway Center panel.
- Entity ID – Entity ID is the unique ID provided to your business.
- Sender ID – The 6 digits ID from which the SMS will be sent.
- Template ID – Template ID is the unique ID for each transactional or Promotional SMS that you wish to use.
- Template Details – Upload the DLT approved templates for the messages you would like to send to your customers.
Keep your API auth credentials handy as we need to paste in our JavaScript code.
Ready your Google Spreadsheet
Go to your Google account, click on Sheets.

A new tab will be opened where you can start a new spreadsheet, Click on Blank from shown template gallery as shown below.

A new blank spreadsheet will open. Rename the Sheet from Untitled spreadsheet to SMS Campaign. Now add headers in the sheet. A column with Customer Name values, B column with Mobile values, C column with Custom1 values, D column with Custom2 values, E column with Custom3 values, F column with Custom4 values. You can personalise using A, C to F columns. Personalisation/customization is optional, you can just send SMS without any customization too. Ensure phone/mobile columns in B column and clean up your mobile phone numbers.

Once you are done with customer data in sheets, now head on to add our ready scripts. You can get our complete downloadable code once you are recharged with your account from our team.
Go to Toolbar, Click on Extensions, then Apps Script.

A new Apps Script tab will open. Rename Untitled project to Send SMS code. By default, code.js editor will be shown.
Remove all codes from the edit window. Copy and paste the given code from our team on this window and edit the following constants. Update sgc_username, sgc_password, sgc_sendername values. Once editing is done, click on save button. Then go back to your sheet.

Refresh the sheet page. Wait for 5 to 10 seconds. New Menu will be added as SMSGatewayCenter. Click on SMSGatewayCenter, new sub-menu will open as Send SMS, then click on Send SMS.

Google requires permission, so it pops up a confirm window to authorize your account with the added script. Click on Continue.

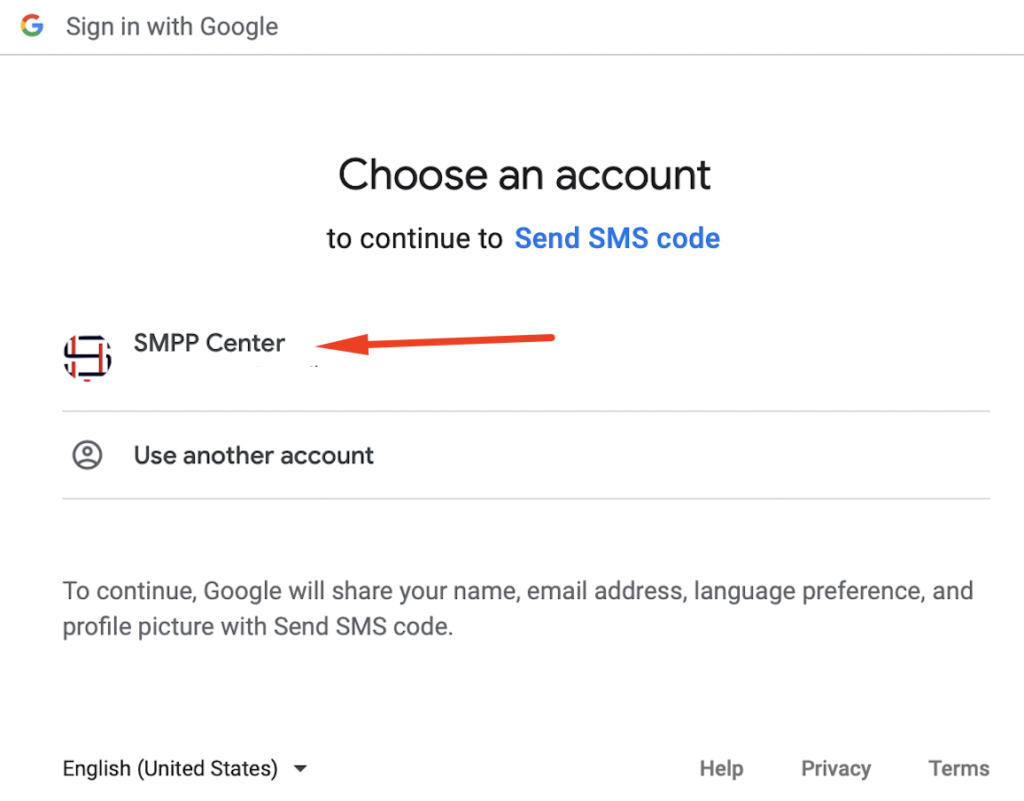
By continuing, it will take you to select your Google account, select the account which you have used for your sheet.
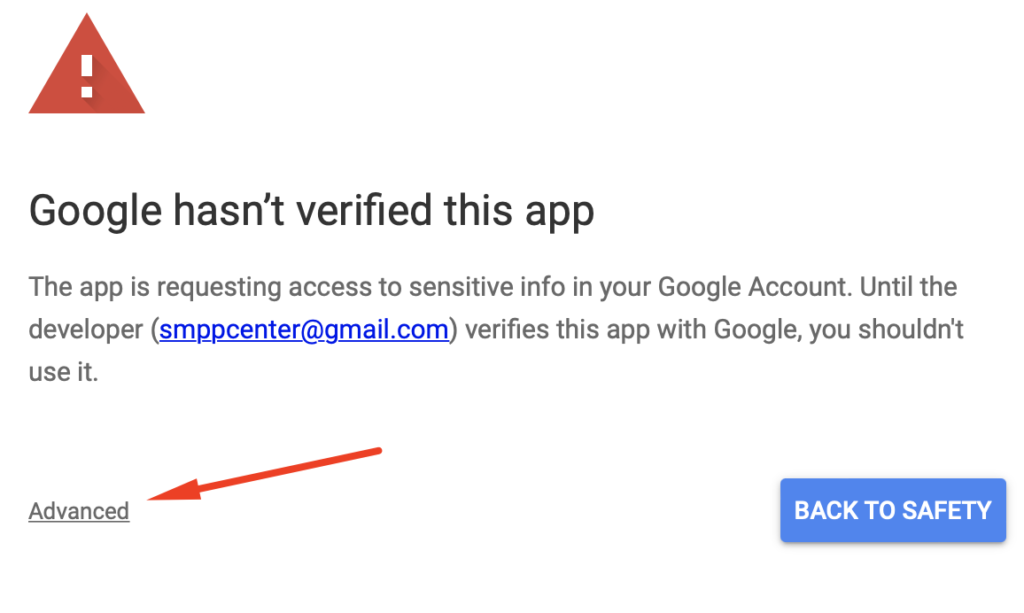
Since our script is not verified from Google, it will give you a warning in the next window, click on Advanced.
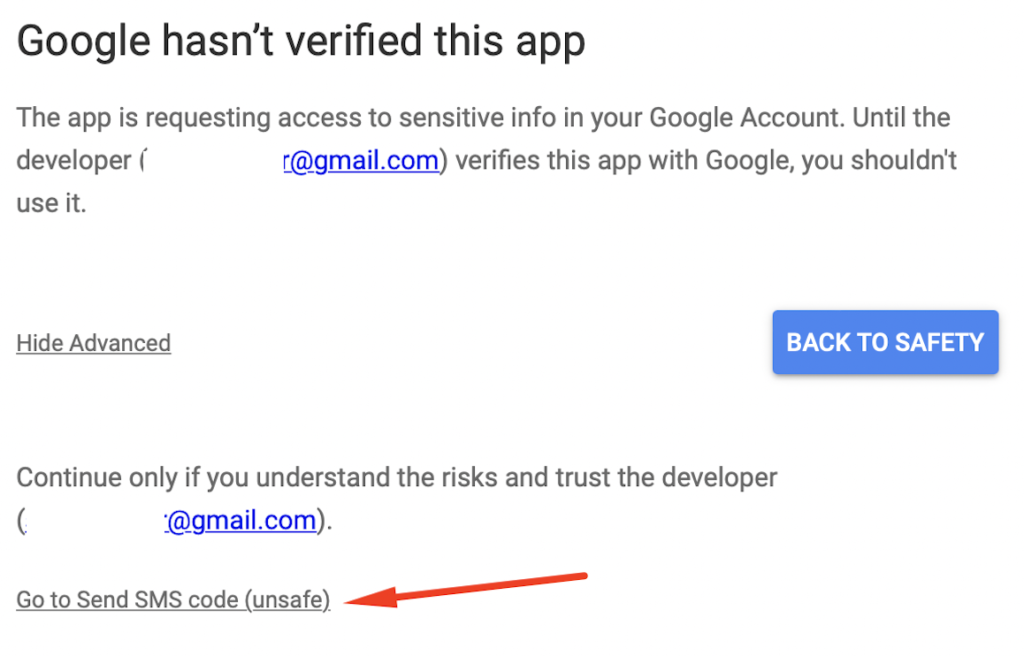
Advanced option will be shown as shown below. Click on Go to Send SMS code (unsafe).
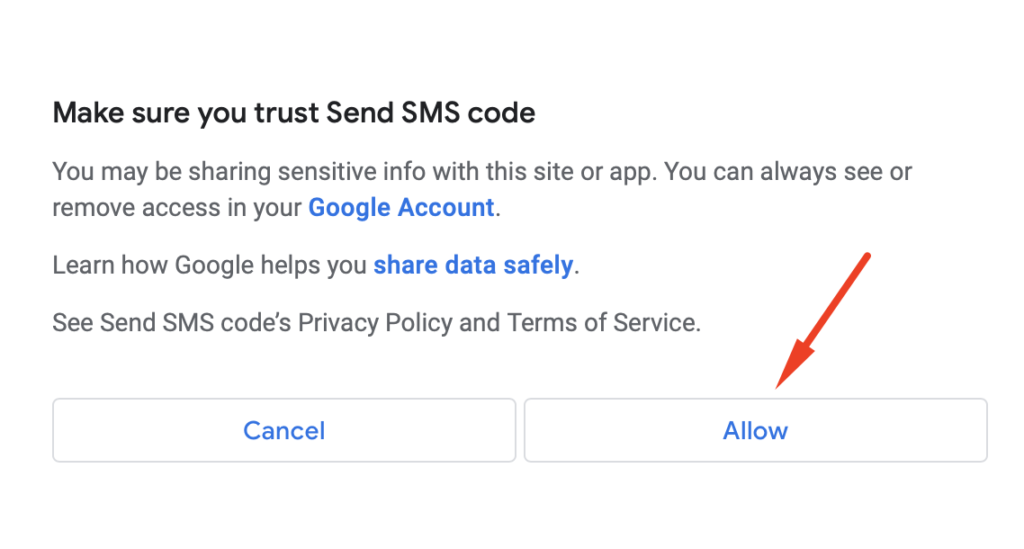
In the next window, it will show the list of permission which your script requires, scroll down below and click on Allow. Do not worry, you are giving permission to your own account and no one else can access your app code or sheet data.
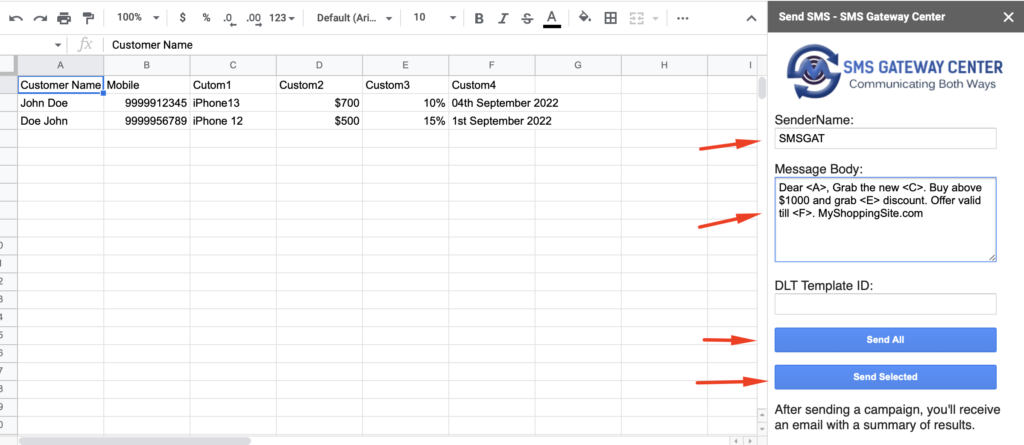
A new sidebar will open. Default Sender name is already added in the script and will be fetched in the sidebar window too. You can change it as you want, if you have multiple sender names approved from us. Enter your message. We have kept customization simple to change actual values from columns.
If you want to address name, then you can use variable as <A> to replace value from column. It is applied for other columns too, such as <C>, <D>, <E>, <F>. We have added a sample message to make you understand in this tutorial.
DLT Template ID is only applicable for Indian routes. If you are using India route then add DLT Template ID else leave blank.
You can send selected or to all numbers from your Google Sheet. Click on Send All to send all phone numbers available in the sheet, or select some specific cells and Click on Send Selected.
You are done, shortly you will be receiving Sent SMS summary to your Email address. And also login to SMS Gateway Center panel and check Delivery Reports.
You can also contact us if you are facing issues, our team will help you to install and run your campaigns smoothly.
This concludes with your integration. Learn more from our SMS API documentation.
👍 Setup Complete!
If you are having difficulty, write to us at [email protected] for assistance.
Are you ready to use this script to send out SMS from Google Sheets?

Testimonials
Why do Great Businesses Trust SMS Gateway Center?
